
Hugo Plus GitHub Equals to Hello World
Objective
I want to publish some content on my blog using some content generator, and I don’t want to hire a hosting. I can use Wordpress, but I prefer to use some technologies that let me know new ways of publishing content.
So, I will use Hugo for this purpose. There are a lot of tools like Jekyllrb, Ghost, Grav, Pelican and more alternatives.
The last step will be set up GitHub actions. When I push the editor branch, on master must be published the public content.
Creating the project.
The first thing that I need to do is install the dependencies, prepare the repository and commit the base configuration on the editor branch.
1
2
3
4
5
6
7
8
9
10
# Install Hugo on a mac using Brew
brew install hugo
# Create new Hugo site
hugo new site Blog
# Initialize git repository
cd Blog & git init
# Add all files for initial commit on editor branch
git checkout -b editor
git add *
git commit -m "Initial commit"
1
2
3
4
5
6
7
8
9
10
11
12
# Add theme as git submodule
git submodule add https://github.com/kakawait/hugo-tranquilpeak-theme.git themes/hugo-tranquilpeak
# Copy default configuration and update with my custom parameters
cp themes/tranquilpeak/exampleSite/config.toml .
vim config.toml
# Commit this changes
git add .gitmodules themes/hugo-tranquilpeak config.toml
git commit "Add Hugo Tranquilpeak theme and update configuration"
# Create this post, and add some summary content
hugo new content/post/Hugo-plus-Github-equals-to-Hello-World.md
git add content/
git commit -m "Add first post"
And that’s setup Hugo with a first post.
Setting up GitHub & GitHub actions
Tip: Create a repository on GitHub before anything.
As said before, I want to publish automatically the changes when I push the editor branch to Github.
Hugo creates the content on the “public” folder, so, I need to make this folder as an orphan branch. I will follow these steps but with some changes.
1
2
3
4
5
6
7
8
9
10
11
12
13
14
15
16
17
18
19
# Ensure that I am on editor branch
git branch
# Add GitHub repository as origin
git remote add origin git@github.com:robertobermejo/robertobermejo.github.io.git
# Push editor branch to github
git push origin editor
# Ignore public folder
echo "public" >> .gitignore
# Initialize master branch
git checkout --orphan master
git reset --hard
# In my case, I need to remove themes folder because I use this as submodule
rm -rf themes
# Commit and push master branch
git commit --allow-empty -m "Initializing master branch"
git push origin master
# Change to editor branch and restore theme folder
git checkout editor
git submodule update
If you want to use a custom domain on GitHub, you must create and commit a file on master branch name “CNAME”. The content of this file must be the domain that you want to use. On my case
1
robertobermejo.es
When you access to GitHub repository settings page, the following option appears.
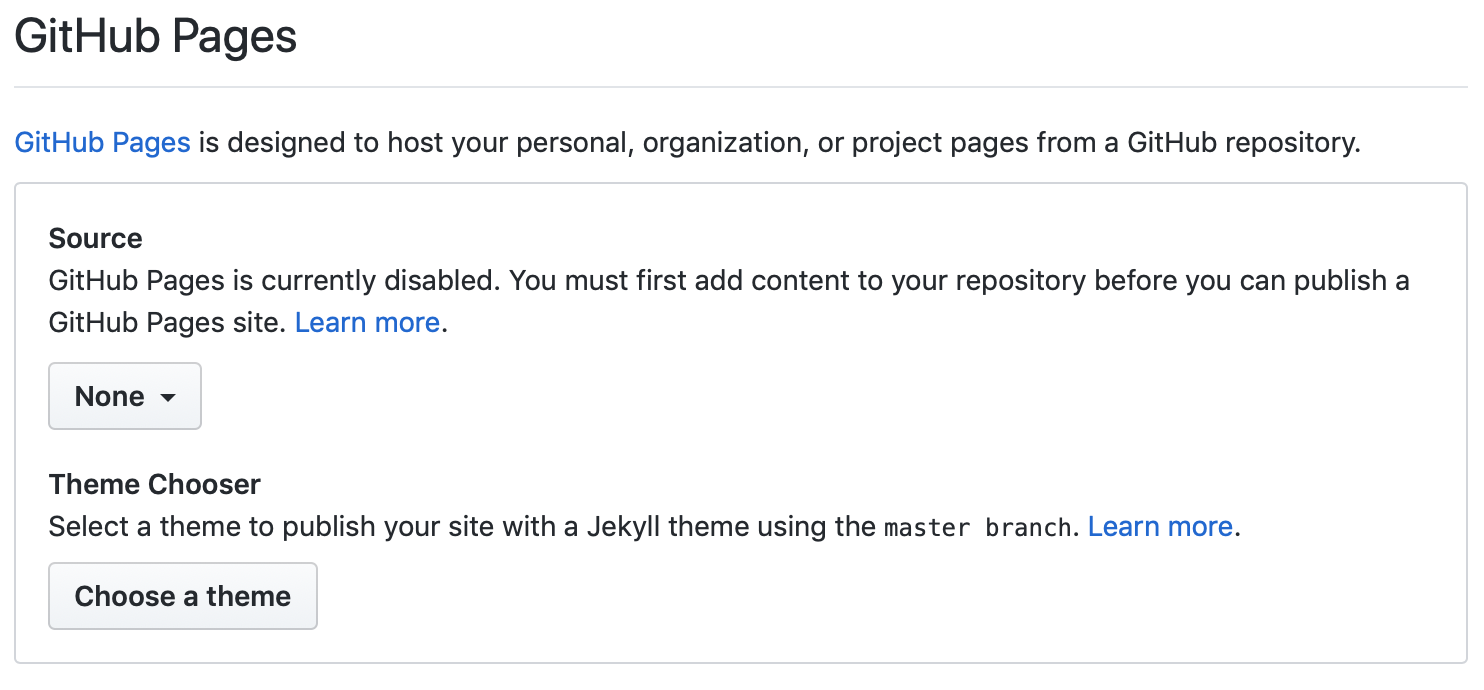 Image of GitHub settings before activating that option
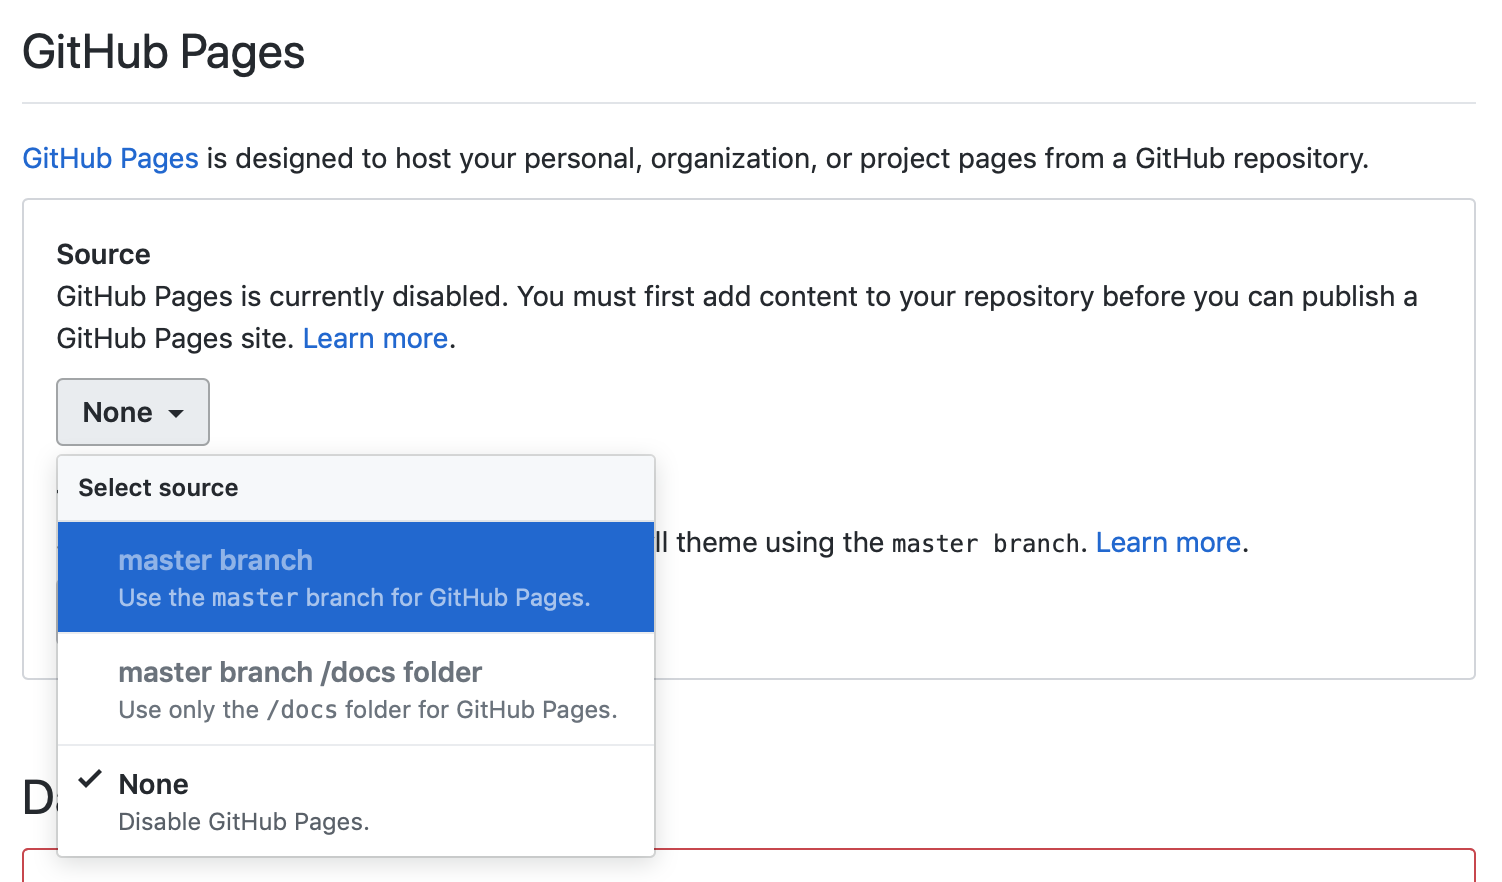 Image of GitHub selecting the master branch as the branch for github pages
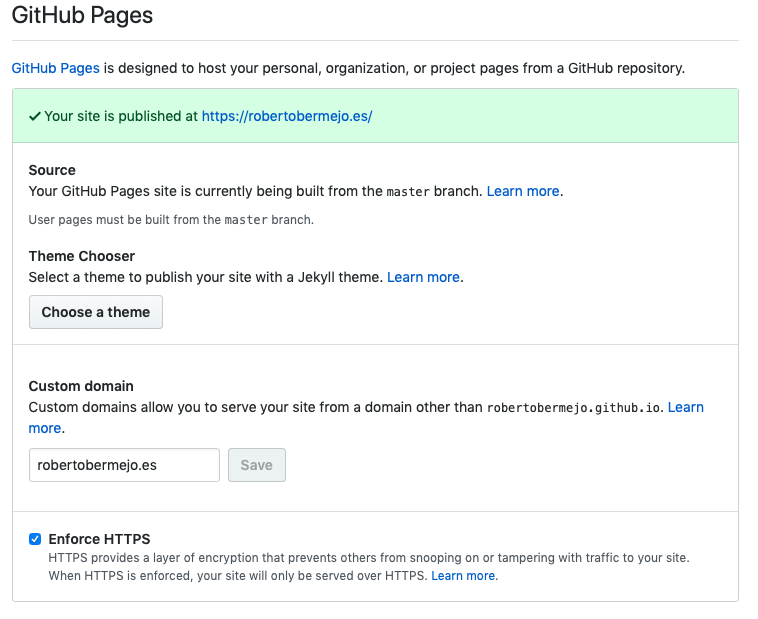 Image of GitHub settings after activating the branch and setting the custom domain option
Now, It’s time to configure GitHub actions. For that, we need a docker image. The “official” image that I see on Docker hub “it’s outdated, so I uploaded a new image on my account.
As I want to use a custom image, It’s needed to add the file “.github/workflow/main.yml” on the repository with the following code:
1
2
3
4
5
6
7
8
9
10
11
12
13
14
15
16
17
18
name: CI

on:
  push:
    branches:
    - editor
    - content/*

jobs:
  build:

    runs-on: ubuntu-latest

    steps:
    - uses: actions/checkout@v1
    - name: Build the site in the robertobermejo/hugo container
      run: |
        docker run -v ${{ github.workspace }}:/srv/ robertobermejo/hugo:latest -s /srv
Don’t forget to commit the changes.
1
2
3
git add .github
git commit -m "Add github actions setup"
git push origin editor
Some minutes later, GitHub’s actions should have the following appearance.
 Image of github settings after activating the branch and setting the custom domain option
And that’s all.
